

Crumple up a rectangle of aluminum foil and unfold. We apply blue and white paint in several places. Blow it through a drinking straw. Cut out a window frame from a white piece of paper and glue it onto the foil.
Material used:
- aluminum foil
- white and blue paint
- scissors
- glue
- white paper
- drinking straw
Related products
-
 Fold a white sheet of paper in half, open it and trace the outline of a glove on one half. Fill in the outline quickly with poster paints, and finally fold the sheet once again (in the same place as at the beginning), "iron" for a moment with your hand, and open it again. On the sheet of paper should be reflected the second image of a glove, and in this fast way we have a pair! Material used:Read more
- technical block
- poster paints
- water
- brush
-
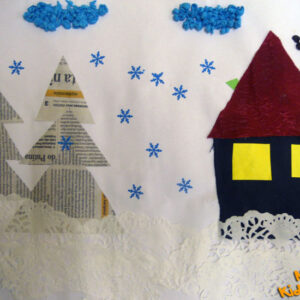 From any materials we create a composition, for example, we cut out trees from gray newspapers, we paste snowdrifts from napkins, clouds are created from balls of blue tissue paper, falling snow cut out with a decorative punch, tissue paper house and chimney smoke from coffee beans. Material used:Read more
- newspapers
- tissue paper
- napkins
- decorative punch
- coffee beans
- glue
- scissors
-
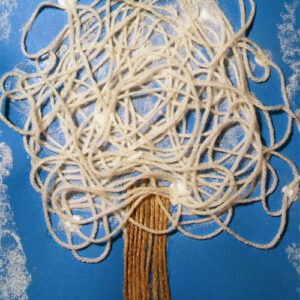 On the blue cardstock, glue the pieces of string (one next to the other) that make up the trunk of the tree. Cover the top of the cardboard with a thick layer of magic glue. Use yarn to create the branches. Sprinkle the empty space (covered with glue) with salt or white decorative sand. Use dry pastels to create a white background of clouds. Material used:Read more
- blue cardboard A4
- white wool
- string
- glue
- scissors
- salt
- crayons dry pastels
Reviews
There are no reviews yet.