

Fold a square sheet of paper twice in half, make any cuts you like, you can also make some holes around with a hole punch. Paint the leaves with poster paints in autumn colors and reflect on the “napkin”.
Material used:
- white card
- scissors
- brush
- poster paints
- leaves
Related products
-
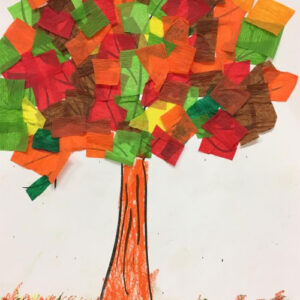 Children prepare the background, on a sheet of white A4 paper they paint with a thick brush with watercolor paints vertical stripes in autumn colors. While the work is drying, the children prepare 4 tree crowns. They draw two crowns on a piece of newspaper with a marker and two crowns on grey paper. Then they try to cut them out along the lines. They glue autumn leaves on the two selected crowns in the form of tissue paper squares. Then, on a white sheet of paper, they draw an autumn animal of their choice: hedgehog, squirrel, or fox. They cut it out. On the dried piece of paper, they glue a strip of grass at the bottom, then tree crowns, small rectangles as trunks, and the animal and leaves. Material used:Read more
- tree template
- squares, rectangles of blotting paper in autumn colors: yellow, orange, red, purple, green, brown
- pastels: brown, light green, dark yellow
- glue stick
-
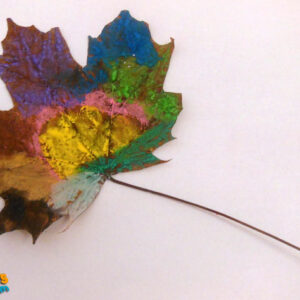 Paint dried leaves with watercolor paints in any color. Decorated in this way, dry autumn leaves take on a completely different expression. We present the works on the background of a white sheet of paper with a narrow frame drawn. Material used:Read more
- dried large leaves
- watercolor paints
- small paintbrushes
-
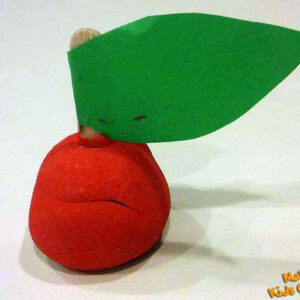 We need to prepare the salt mass, then we ball a round apple.In a soft ball we put a stick from ice cream to which we stick a green leaf. Leave it on the windowsill to dry. After drying paint the apple with red paint and you are done. Material used:Read more
- salt mass: salt + flour + water
- ice cream stick
- green paper
- scissors
- red paint
- glue
- brush
-
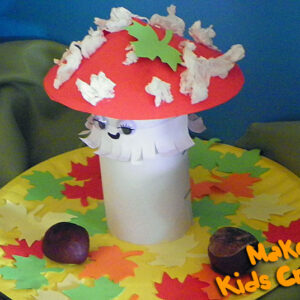 Lubricate a toilet paper roll with glue and wrap a piece of paper around it at the end, gluing it together. Glue a white frill in the middle of the roll. Above the frill stick the eyes, draw a face, nose, etc. Fold the red circle into a cone and glue it together. Make balls out of pieces of tissue paper and glue on the red cone. Glue the hat to the top end of the white roll. Glue leaves and chestnuts as desired on a plate. Glue the mushroom to the plate. Finished :) Now only need to expose in a visible place. Material used:Read more
- red circle
- 9-10 pieces of white tissue paper
- paper roll
- cut piece of white paper to the width of the roll
- plastic eyes
- colored leaves cut out with a hole punch
- 2-3 chestnuts
- green or yellow plate
- white frill
Reviews
There are no reviews yet.