

On an A4 sheet of paper, we make a mountain shape with a bandage and stick it on, then we paint the sky (blue paint) and the mountains (black, brown). We decorate the work with glitter.
Material used:
- A4 sheet
- bandage
- magic glue
- brown, black and blue paint
- loose glitter
Related products
-
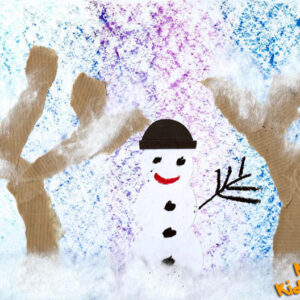 The work was made with the use of elements of D. Dziamska's Education Through Movement method. The background of the work was created while painting with oil pastel to slow music (any waltz). Then children were tearing strips of grey paper to the rhythm of lively, fast music. From these strips they constructed trees and then made a snowman from origami circles. At the end they drew the missing elements and decorated the snowman with cotton wool imitating snow. Material used:Read more
- oil pastels
- grey paper
- glue
- cotton wool
- white and black origami circles
- drawing block
-
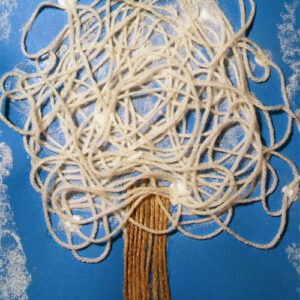 On the blue cardstock, glue the pieces of string (one next to the other) that make up the trunk of the tree. Cover the top of the cardboard with a thick layer of magic glue. Use yarn to create the branches. Sprinkle the empty space (covered with glue) with salt or white decorative sand. Use dry pastels to create a white background of clouds. Material used:Read more
- blue cardboard A4
- white wool
- string
- glue
- scissors
- salt
- crayons dry pastels
-
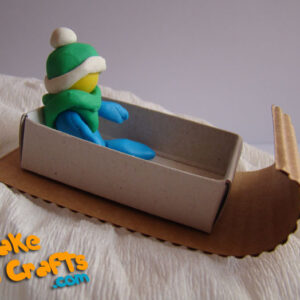 Cut a rectangular piece from corrugated cardboard and twist one end. Glue the middle piece from the matchbox to the cardboard. Put a man made of Plasticine into the toboggan. Such a toy can be successfully used by children for great fun. Material used:Read more
- matchbook
- corrugated cardboard
- scissors
- glue
- plasticine
-
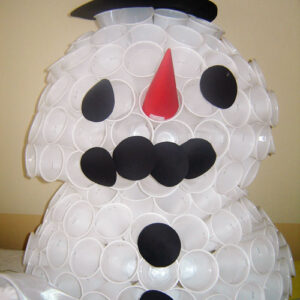 The snowman is made of plastic cups that the children used during their trips (so he is a very ecological snowman). The children put the cups together by themselves and the teacher staples them together with a stapler. Other elements: hat, buttons, nose, eyes and mouth are made of paper. Material used:Read more
- plastic cups
- stapler
- colored adhesive paper
- glue
- scissors
Reviews
There are no reviews yet.