

Cut out a shape resembling a tree from a brown sheet of paper (you can also trace the child’s hand). Cut out the tree and stick it onto the blue card. Now all you have to do is decorate the tree and the card with snow using white paint and your own fingers.
Material used:
- scissors
- glue
- blue card
- brown card
- white poster paint
Related products
-
 Cut the paper plate in half making a hat shape. Glue it on the cardboard. Cut out a circle (pom-pom) and glue it over the plate. Decorate the plate (hat) by stamping it with a finger dipped in poster paint. Cut yarn into small pieces 1-2 cm. Glue the pieces of yarn on the circle decorating the pom-pom and the winter hat is ready. Material used:Read more
- technical block
- glue
- scissors
- paper plate
- poster paints
- colored yarn
-
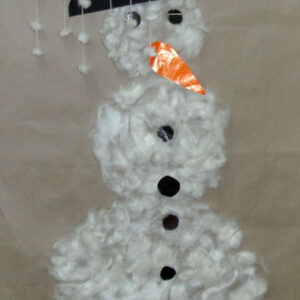 The work shows a snowman made of cotton wool. On a sheet of gray paper we draw three circles, we also draw small circles (buttons) and cut them out. Then we spread glue on the drawn circles and stick on cotton wool. At the end we glue a nose cut out of orange cardboard, buttons and a hat. Material used:Read more
- sheet of gray paper
- black and orange cardboard
- scissors
- cotton wool
- pencil
- glue
-
 Place the fabric on the table, the picture on it and tracing paper on the picture. With the help of various tools trace the contours of the picture (without the stars). Press firmly, but only enough to leave a white trace on the tracing paper. If you press too hard, you can make a hole. Use a nail to correct the contours of the stars and the chimney. When all the contours have been corrected, erase the pencil marks on the other side. Turn the sheet of paper over again and place it this time on the fabric itself. Correct some of the less visible contours. Using the head of a pin placed in a skewer stick, apply shadows and snow. Place a piece of canvas under the tracing paper and use the pin head to reflect its texture. We can reflect different objects on tracing paper. It all depends on your idea. In the stars we make a few holes with a pin. We color the picture with markers, but in such a way as not to color the hollows. Such a picture can be for example hung in the window. You can also put a dark piece of paper underneath, which will make the picture even more visible. Material used:Read more
- tracing paper
- sketch of a winter picture
- cutter
- pin
- crochet hook
- nail
- shashlik stick with a pin
- colored markers
- eraser
- piece of canvas
- soft pad

-
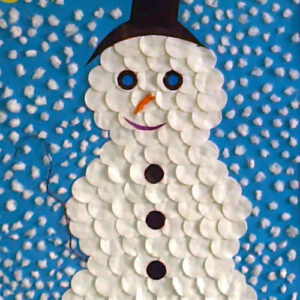 On a large sheet of paper, draw a snowman template. Paste it with cotton balls so that they slightly overlap each other. From colored paper cut out: buttons, eyes, nose, mouth, hat, possibly other decorative elements. Glue everything in place. Around the snowman we glue balls made of cotton wool (snow). Material used:Read more
- scissors
- glue
- colored paper
- cotton balls
- cotton wool
- cardboard
Reviews
There are no reviews yet.