Showing 1–16 of 102 results
-
Children paint the rolls with white paint, glue carrots cut out of paper and black dots as buttons and scarves cut out from a promotional newspaper. They put a cap made from a liquid cap, such as fabric softener/wash, on the roll. Material used:Read more
- paper towel roll
- white paint
- punch
- colored paper
- pattern imitating a scarf (here: a winter promotional brochure from a DIY store)
- glue
- scissors
- plastic caps
-
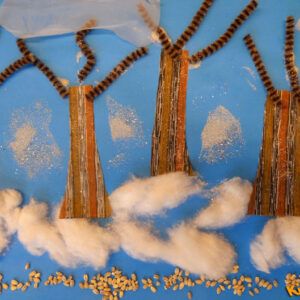
We grease a blue sheet of paper with glue and put out snow from porridge, cotton wool. Then glue on the trees, clouds and falling snow. The tree trunks are made from scraps of fabric, the branches from creative wire, and the clouds from foil. Finally, the card is smeared with glue in places and sprinkled with glitter. Material used:Read more
- pearl barley groats, barley groats
- cotton wool
- scraps of cloth
- semolina
- glitter
- creative sticks
- glue
- scissors
- foil
-
Thread three styrofoam balls onto a toothpick, place the snowman on a circle formed from a roll of Plasticine. Glue eyes, buttons, mouth. We tie a scarf from a strip of tissue paper of any color, and from colored paper we make a cylinder. Material used:Read more
- a toothpick for shashliks
- 3 Styrofoam balls of the same size or 3 of different size
- white plasticine
- colored papers
- hole punches with a pattern
- glue
- tissue paper
-
On an A4 sheet of paper, we make a mountain shape with a bandage and stick it on, then we paint the sky (blue paint) and the mountains (black, brown). We decorate the work with glitter. Material used:Read more
- A4 sheet
- bandage
- magic glue
- brown, black and blue paint
- loose glitter
-
Glue toilet paper rolls together and place crumpled pieces of paper inside. A hat from a bucket taped with paper, a scarf created from tissue paper dots, a nose from a carrot wrapped in tissue paper. The snowman in the picture grew to 140 cm. Material used:Read more
- toilet paper rolls
- glue
- tissue paper
- plastic bucket
- carrot
-
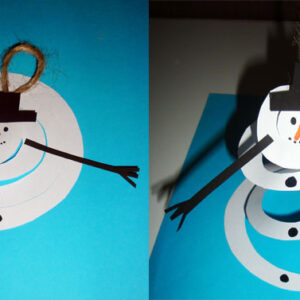
Place a dessert plate on a white sheet of A4 paper and trace a circle. Next, we draw a spiral with a head shape in the middle. The children cut out the spiral following the trace. The result is the torso of a snowman. We decorate the head with markers by drawing charcoal eyes, a carrot nose and charcoal mouth and charcoal buttons. From colored paper, cut out a hat and twig arms for the snowman, which we then glue to the snowman figure. Finally, glue a piece of string to the hat and set our snowman in motion (the snowman dances up and down, and when spring comes, our snowman melts). Material used:Read more
- white sheet of paper
- dessert plate
- colored paper (black)
- markers
- scissors
- glue
- piece of string
-
Children are given drinking yogurt bottles, colored paper, scissors and adhesive paper. They cut out a circle for a hat for the snowman, small circles for eyes and buttons, and a nose. Finally, the snowmen get navy blue scarves. Material used:Read more
- yogurt bottles
- colored paper
- scissors
- adhesive paper
-
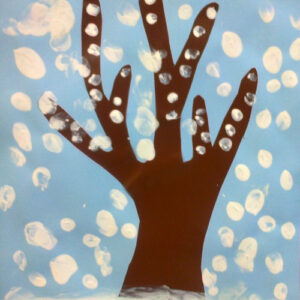
Cut out a shape resembling a tree from a brown sheet of paper (you can also trace the child's hand). Cut out the tree and stick it onto the blue card. Now all you have to do is decorate the tree and the card with snow using white paint and your own fingers. Material used:Read more
- scissors
- glue
- blue card
- brown card
- white poster paint
-
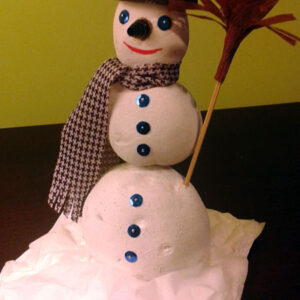
Connect three potatoes together with toothpicks. From the potato that is at the very bottom cut off a slice, then the snowman will stand. The hat is 2 slices of potato - top and middle, attached with a toothpick. Paint the snowman white and the hat brown. Cut a piece of black or brown tissue paper 7 cm wide. Smear it from halfway along the glue, but only on one side (not all) and fold it. Do it again. Cut the tissue paper from the side, which is not glued. Again, grease the tissue paper and wrap it around a skewer stick. Paint the stick with brown paint. Attach the hat to the snowman's head. Then attach the nose. Use pins to attach sequins as buttons and eyes. Paint a smile with red paint. Finally, tie a scarf and stick a broomstick. The snowman is ready. Material used:Read more
- potatoes
- toothpicks
- skewer stick
- piece of tissue paper
- sequins
- beads
- pins
- glue
- Tempera paint
- sunflower seeds
-
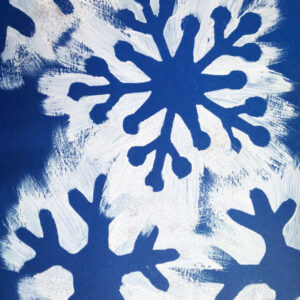
Apply snow star templates to dark cardstock and paint with white paint. Set the stars aside and sprinkle with glitter. Material used:Read more
- dark colored cardboard
- large paper snowflakes
- white poster paint
- glitter
-
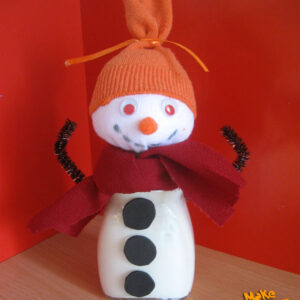
Paint the jar inside with white paint (tempera) and leave it to dry. Put cotton wool into a white sock, form balls, tie them together and cut off the excess. Stick on eyes, a nose from a pompom and draw a smile. From a colored sock we make a hat, cut off the unnecessary part and tie with a colored ribbon. So made head put on the jar (in the part where the cap should be), you can glue it. On the back stick the hands of the creative wire with tape. Create a scarf from a piece of fabric. Glue "buttons" (can be made of black pompoms or cut out of black decorative foam). And the snowman is ready. Material used:Read more
- jar with a capacity of about 200 ml (for example after Kamis mustard because of its shape)
- white tempera paint
- white and colored socks
- cotton wool
- movable eyes
- decorative pompoms (orange and 3 black)
- brown creative wire
- a piece of fabric in any color you choose
- bookbinding glue "magic"
- transparent adhesive tape
- piece of colored ribbon
-
Paint the background of the card using the wet-on-wet technique in blue. We put white chalk in a container with water and sugar, then we paint a snowman and snowflakes with wet chalk on a piece of paper. Paint the snowman with eyes, buttons, pots, hands and glue cotton wool at the bottom of the card. Material used:Read more
- watercolor paints
- a bowl of water
- brush
- chalk
- sugar
- tempera paint
- cotton wool
- glue
-
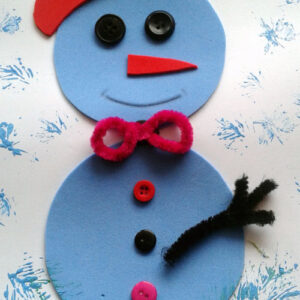
Cut out two circles from the blue decorative foam and stick them on a white sheet of paper. Then, also from foam cut out a snowman's headdress and nose. Then glue on black buttons as eyes and colored buttons for the belly. Draw a smile. From creative wires form a bow tie and a broomstick for the snowman, glue them on with Plasticine. Finally, we decorate the work with snowflakes, which are formed from a spruce branch painted with paint. Material used:Read more
- white card
- blue and red decorative foam
- buttons
- plushy wires
- scissors
- wikol glue
- plasticine
- blue paint
- spruce branch
-
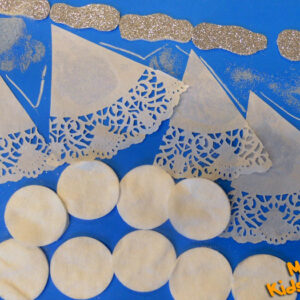
Art work made in the collage technique. We cut out mountains from decorative napkins and glue them to the blue card. At the bottom of the card stick on cotton balls, decorate the top of the card with clouds cut out of glitter paper. Finally, the card is spread with glue and sprinkled with semolina. Material used:Read more
- glitter paper
- napkins
- cotton pads
- semolina
- glue
- scissors
-
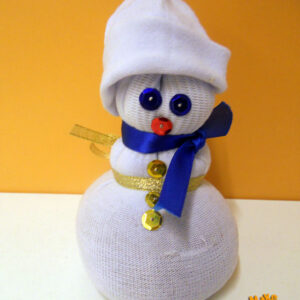
Cut a white sock into two parts, from the longer part make a snowman's torso and head by stuffing it with peas. From a narrow ribbon form three balls by tying the sock. The second part of the sock will serve as the snowman's hat. Finally, glue on sequin buttons, eyes and mouth. Tie the wider ribbon into a scarf. Material used:Read more
- white sock
- Narrow and wider ribbon
- sequins
- peas
- glue
- scissors
-
During a walk with children, you can collect branches, preferably a few days in advance, so that they dry out. On a blue sheet of paper, arrange the branches-sticks in such a way as to form a feeder. In the middle of the feeder we glue a sparrow (cut out by the teacher). Near its beak we glue seeds. The whole is decorated with cotton wool-snow. The work should be preceded by a demonstration. Material used:Read more
- light blue sheets of paper
- Cut out illustrations of sparrows
- branches
- cotton wool
- sunflower seeds, wheat
- glue


