Showing 1–16 of 34 results
-
Children paint the rolls with white paint, glue carrots cut out of paper and black dots as buttons and scarves cut out from a promotional newspaper. They put a cap made from a liquid cap, such as fabric softener/wash, on the roll. Material used:Read more
- paper towel roll
- white paint
- punch
- colored paper
- pattern imitating a scarf (here: a winter promotional brochure from a DIY store)
- glue
- scissors
- plastic caps
-
Thread three styrofoam balls onto a toothpick, place the snowman on a circle formed from a roll of Plasticine. Glue eyes, buttons, mouth. We tie a scarf from a strip of tissue paper of any color, and from colored paper we make a cylinder. Material used:Read more
- a toothpick for shashliks
- 3 Styrofoam balls of the same size or 3 of different size
- white plasticine
- colored papers
- hole punches with a pattern
- glue
- tissue paper
-
Glue toilet paper rolls together and place crumpled pieces of paper inside. A hat from a bucket taped with paper, a scarf created from tissue paper dots, a nose from a carrot wrapped in tissue paper. The snowman in the picture grew to 140 cm. Material used:Read more
- toilet paper rolls
- glue
- tissue paper
- plastic bucket
- carrot
-
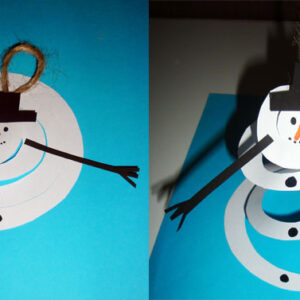
Place a dessert plate on a white sheet of A4 paper and trace a circle. Next, we draw a spiral with a head shape in the middle. The children cut out the spiral following the trace. The result is the torso of a snowman. We decorate the head with markers by drawing charcoal eyes, a carrot nose and charcoal mouth and charcoal buttons. From colored paper, cut out a hat and twig arms for the snowman, which we then glue to the snowman figure. Finally, glue a piece of string to the hat and set our snowman in motion (the snowman dances up and down, and when spring comes, our snowman melts). Material used:Read more
- white sheet of paper
- dessert plate
- colored paper (black)
- markers
- scissors
- glue
- piece of string
-
Children are given drinking yogurt bottles, colored paper, scissors and adhesive paper. They cut out a circle for a hat for the snowman, small circles for eyes and buttons, and a nose. Finally, the snowmen get navy blue scarves. Material used:Read more
- yogurt bottles
- colored paper
- scissors
- adhesive paper
-
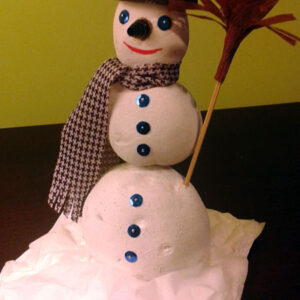
Connect three potatoes together with toothpicks. From the potato that is at the very bottom cut off a slice, then the snowman will stand. The hat is 2 slices of potato - top and middle, attached with a toothpick. Paint the snowman white and the hat brown. Cut a piece of black or brown tissue paper 7 cm wide. Smear it from halfway along the glue, but only on one side (not all) and fold it. Do it again. Cut the tissue paper from the side, which is not glued. Again, grease the tissue paper and wrap it around a skewer stick. Paint the stick with brown paint. Attach the hat to the snowman's head. Then attach the nose. Use pins to attach sequins as buttons and eyes. Paint a smile with red paint. Finally, tie a scarf and stick a broomstick. The snowman is ready. Material used:Read more
- potatoes
- toothpicks
- skewer stick
- piece of tissue paper
- sequins
- beads
- pins
- glue
- Tempera paint
- sunflower seeds
-
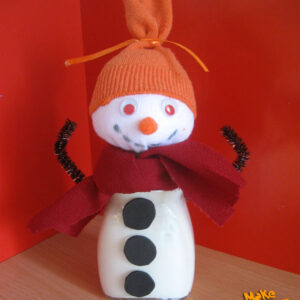
Paint the jar inside with white paint (tempera) and leave it to dry. Put cotton wool into a white sock, form balls, tie them together and cut off the excess. Stick on eyes, a nose from a pompom and draw a smile. From a colored sock we make a hat, cut off the unnecessary part and tie with a colored ribbon. So made head put on the jar (in the part where the cap should be), you can glue it. On the back stick the hands of the creative wire with tape. Create a scarf from a piece of fabric. Glue "buttons" (can be made of black pompoms or cut out of black decorative foam). And the snowman is ready. Material used:Read more
- jar with a capacity of about 200 ml (for example after Kamis mustard because of its shape)
- white tempera paint
- white and colored socks
- cotton wool
- movable eyes
- decorative pompoms (orange and 3 black)
- brown creative wire
- a piece of fabric in any color you choose
- bookbinding glue "magic"
- transparent adhesive tape
- piece of colored ribbon
-
Paint the background of the card using the wet-on-wet technique in blue. We put white chalk in a container with water and sugar, then we paint a snowman and snowflakes with wet chalk on a piece of paper. Paint the snowman with eyes, buttons, pots, hands and glue cotton wool at the bottom of the card. Material used:Read more
- watercolor paints
- a bowl of water
- brush
- chalk
- sugar
- tempera paint
- cotton wool
- glue
-
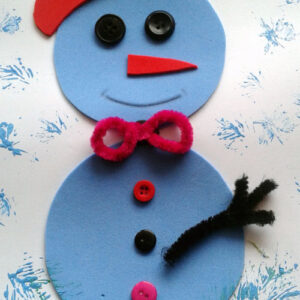
Cut out two circles from the blue decorative foam and stick them on a white sheet of paper. Then, also from foam cut out a snowman's headdress and nose. Then glue on black buttons as eyes and colored buttons for the belly. Draw a smile. From creative wires form a bow tie and a broomstick for the snowman, glue them on with Plasticine. Finally, we decorate the work with snowflakes, which are formed from a spruce branch painted with paint. Material used:Read more
- white card
- blue and red decorative foam
- buttons
- plushy wires
- scissors
- wikol glue
- plasticine
- blue paint
- spruce branch
-
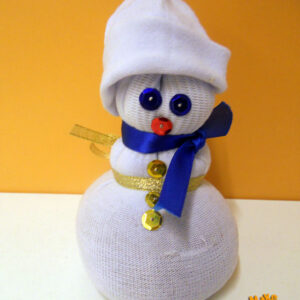
Cut a white sock into two parts, from the longer part make a snowman's torso and head by stuffing it with peas. From a narrow ribbon form three balls by tying the sock. The second part of the sock will serve as the snowman's hat. Finally, glue on sequin buttons, eyes and mouth. Tie the wider ribbon into a scarf. Material used:Read more
- white sock
- Narrow and wider ribbon
- sequins
- peas
- glue
- scissors
-
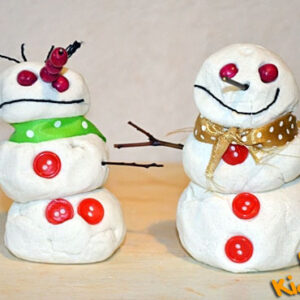
Snowmen were made of homemade dougholine, prepared by the teacher (the ingredients are given in the order of pouring them into the bowl). From the ready mass children stick snowmen, decorate them with twigs, buttons, beads, yarn. Material used: Dougholine:Read more
- 2 cups of wheat flour
- 1 cup salt (fine, not crystals)
- 2 tbsp vegetable oil
- 2 tbsp (flat) baking powder
- 1.5 cups boiling water (the kind that just boiled)
- A dab of white tempera paint to color the mixture white.
- Allspice or beads for the snowmen's eyes,
- twigs for the hands and noses
- yarn for smiles and hair
- buttons
- ribbons
-
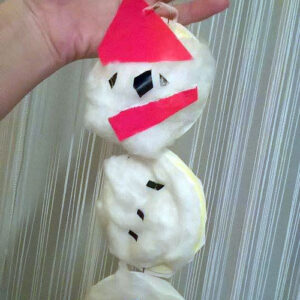
Trace with a glass 6 circles and cut them out, place one above the other and give a string through the center. Glue another three circles together. We glue the balls of the snowman with cotton wool and decorate with cutouts (buttons, nose, hat/hat). Material used:Read more
- cup, glass for tracing circles
- cotton wool
- glue
- colored paper
- string
- scissors
-
First, children make two pompoms out of white yarn or wool. To do that, prepare two cardboard circles with a hole in the middle for each child (the diameter of the circles in this case is about 4 cm, and the holes 1.5 cm). Children wrap strands of yarn on cardboard circles - remember that to make each pom-pom you need two identical circles. However, nothing stands in the way of reusing the circles cut out of cardboard. The direction of winding: through the hole to the outside of the circle and again to the hole, etc. When the yarn is already wound across the entire width of the circle, and the child finds it difficult to put consecutive strips of yarn through the hole in the circle, carefully move the yarn away from the hole in one place, so that you can insert the scissors between two circles and cut strips of yarn around the circumference of the circle. To prevent the pompom tassels from falling apart, hold the center of the circle the entire time. After cutting the strands of yarn, pull one strand of yarn between the circles and tie all the tassels tightly. The last step in making the pompoms is to pull them out of the cardboard forms. Once you have two pompoms ready, just glue them together. Make the snowman's hat from an egg stamping, the nose from colored paper, and the scarf from felt. Material used:Read more
- white yarn
- Two cardboard circles with a diameter of about 4 cm
- Egg-press (cardboard)
- felt
- colored paper
- movable eyes
- scissors
- glue
-
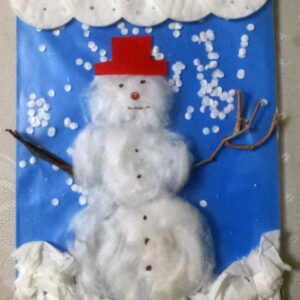
First, the children, together with the teacher, make snowflakes - these are circles cut out of a white sheet of paper by a hole punch, then with the teacher's help the children pour their snowflakes into a T-shirt, which they pin with a stapler to a blue sheet of paper. On the T-shirt they glue a snowman silhouette made of cotton wool, and under it they glue snow from torn pieces of tissue paper. After that the preschoolers receive cotton balls from the teacher, which will be the clouds - they glue them on the very top in the way they choose. Finally the children glue on the snowman's hands from a stick and glue on a hat cut out of colored paper. Once everything is dry children decorate their snowman with glitter markers, paint snowflakes on the shirt, on the clouds. The art work described above is a very attractive form because it allows to stimulate children tactilely and visually, at the same time it is attractive for the preschooler because when he moves or shakes his snowman, the snowflakes move and move giving the impression of falling snow. Material used:Read more
- blue A4 sheet of paper
- A white A4 sheet of paper
- punch
- stapler
- cotton wool
- tissues
- vikol glue
- cosmetic pads
- A4 shirt
- sticks
- glitter markers
- scissors
- coloured paper
-
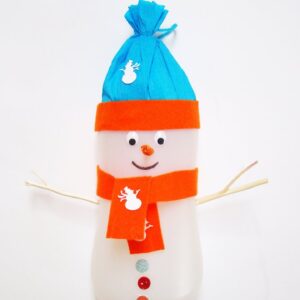
Tape the top of the bottle all around with a strip of double-sided tape. Cut off a piece of tissue paper and stick it on the tape. Tie with yarn at the top. Tape the edges of the tissue paper with a strip of felt. Under the hat stick the moving eyes. Make a hole for the nose (CAUTION! To puncture the bottle you need a sharp knife, this operation should be done only by an ADULT) and attach in it a toothpick. Cover the toothpick with orange tissue paper or colored paper. Draw a smile with a pen. Cut out a strip of felt for a scarf and stick it under the head. Cut the ends to form a fringe. Create holes on both sides and attach in them sticks. Glue small buttons. Decorate the scarf and hat with elements cut from a hole punch (snowman shape). Material used:Read more
- large bottle
- felt
- glue
- two sticks
- toothpick
- colored paper
- buttons
- moving eyes
- crepe paper
- crewel

-
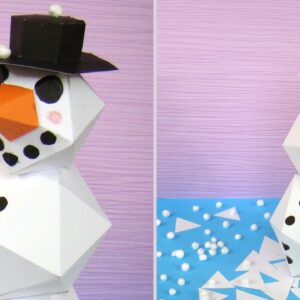
Nose Cut out the snowman's nose from the template. Bend the tabs upwards (you can run scissors or a circle along the line - it will be easier to fold), fold along the line into a pyramid and glue. Hat Cut out a rectangle and glue it together to form a hexagon. Cut out a large hexagon and in its center a smaller one. Paste the glued hexagon into the cut out hole. Cut out a third hexagon, fold the tabs and use them to glue the hexagon on the underside as the hat's lid. Snowman Cut out printed templates along the solid lines and then fold them along the dotted lines. Glue them together using tabs. From a black piece of paper, cut out two larger circles and five smaller ones - eyes and smile; and a few medium ones - buttons. We glue the eyes, nose and smile to the smallest white solid. Glue a hat on top. Glue more solids together to form a snowman. Now glue the buttons to the snowman. Glue the triangles you cut out (or other pieces of white paper) to the blue card. Then glue the snowman and at the end of Styrofoam balls - snow. Material used:Read more
- white sheets of technical A4 with printed template in three sizes
- a black sheet A4 from the technical block
- orange sheet of A4 paper
- polystyrene balls
- blue sheet of A4 paper
- glue
- ruler
- pencil
- scissors
- red crayon

